How to Integrate Apple iCalendar with Supernote Calendar for a Streamlined Workflow
The Supernote Calendar is a powerful tool for planning and organization, but it becomes even more effective when integrated with Apple iCalendar. By linking the two, you can ensure your events, appointments, and even notes sync seamlessly between devices. One of the best ways to manage this integration while keeping your Supernote clutter-free is to create a dedicated email address for calendar syncing.
This guide will walk you through the process step by step.

Macbook and Supernote
Step 1: Create a New Email Address
To keep your Supernote Calendar organized and prevent unnecessary clutter, it’s best to create a separate email account specifically for calendar syncing. You can use a free provider such as Gmail, or Yahoo, for this example I am using Gmail.
How to create a Gmail account:
1. Go to Google Account Sign Up.
2. Fill in your details and create a strong password.
3. Follow the prompts to verify your identity.
4. Once your account is created, sign in and go to Google Calendar.
If you prefer another email provider, the process is similar—just follow their account creation steps.
Step 2: Add the New Email Address to iCalendar
Once you’ve created the new email address, the next step is to add it to Apple iCalendar so it can receive and sync events.
How to Add an Email to iCalendar on iPhone or iPad:
1. Open Settings on your Apple device.
2. Scroll down and tap Calendar > Accounts > Add Account.
3. Choose your email provider (Google, Outlook, etc.).
4. Sign in with your newly created email address.
5. Ensure Calendars is toggled ON during setup.
How to Add an Email to iCalendar on Mac:
1. Open the Calendar app.
2. Click Calendar in the top menu bar, then select Accounts.
3. Click Add Account, select your email provider, and sign in.
4. Ensure Calendars is checked under the account settings.
Now, any events sent to this email address will automatically appear in your iCalendar.
Step 3: Add the New Email Address to Supernote Calendar
Now that iCalendar is receiving events from this email, it’s time to connect it to Supernote.
How to Sync Your Calendar on Supernote:
1. Open your Supernote Calendar.
2. Tap on Settings (hamburger menu on top left).
3. Select Add Account and choose your email provider.
4. Sign in using your newly created email address.
5. Ensure auto syncing is enabled.
Once added, any events added to this calendar in iCalendar will also appear on Supernote, and vice versa.
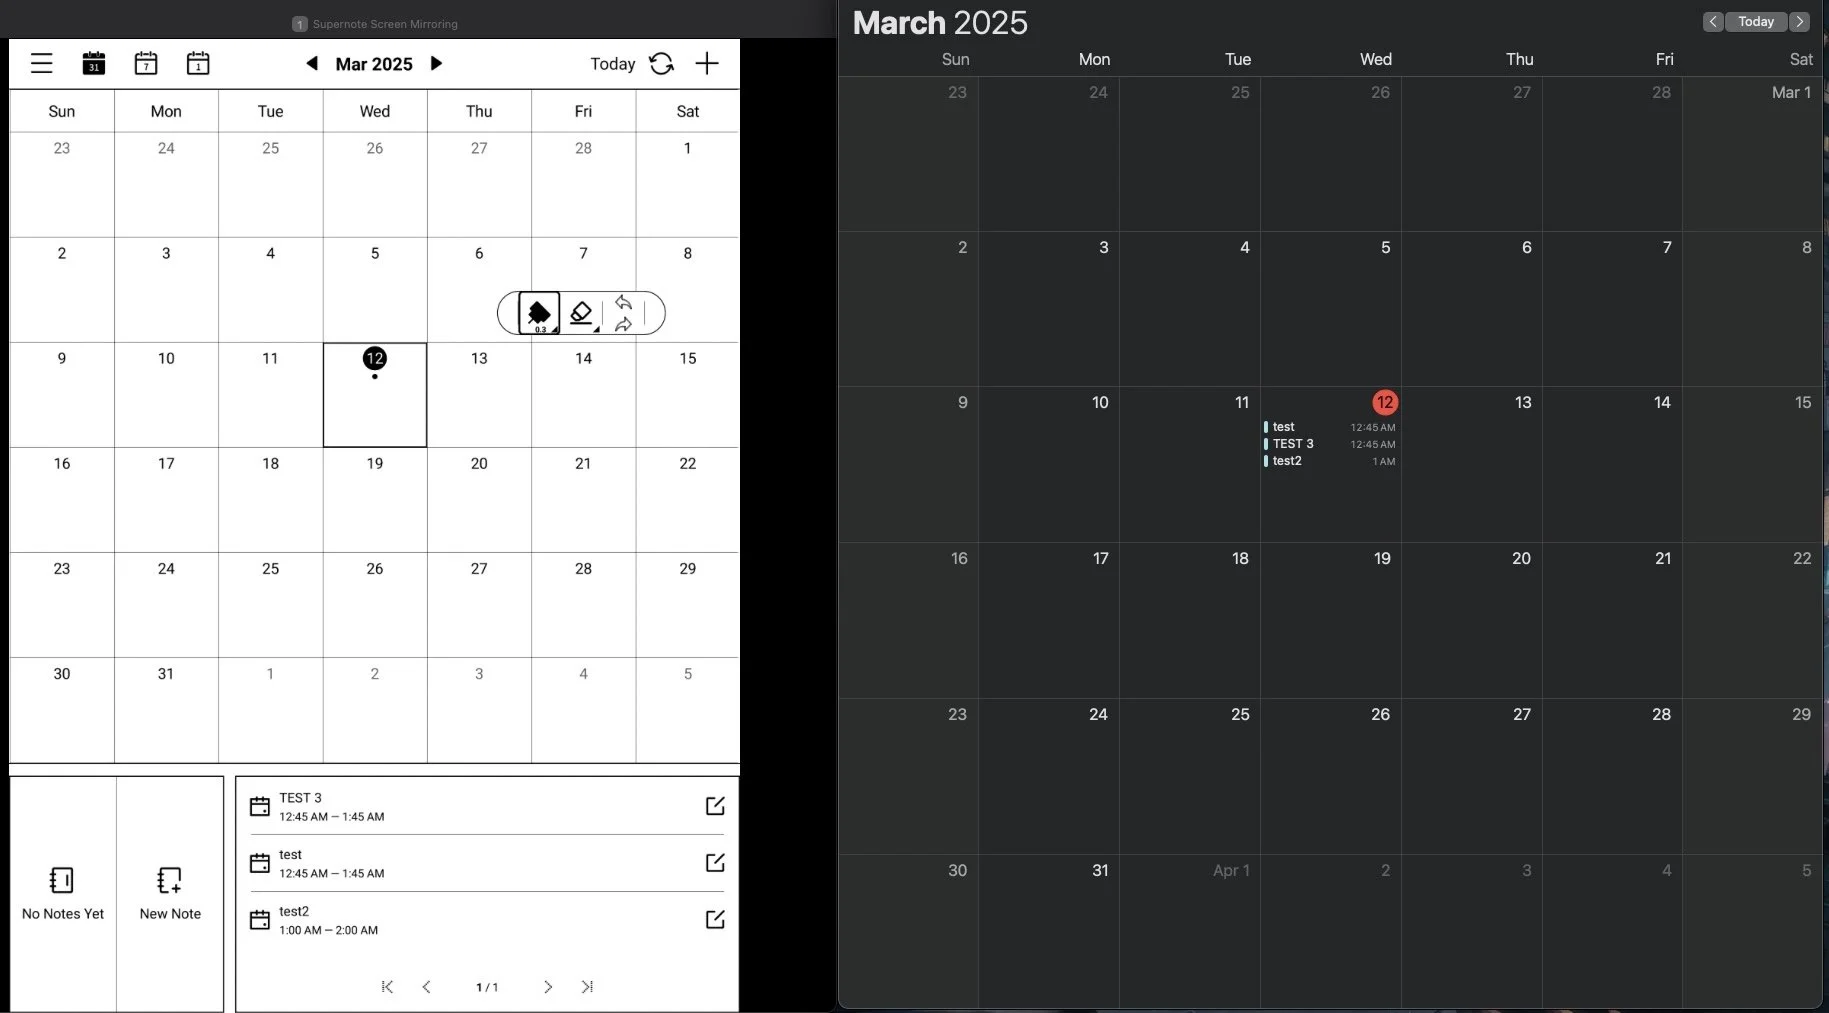
Supernote Calendar on the left and iCalendar on the right.
Benefits of This Workflow
1. A Clutter-Free Supernote Calendar
• By using a dedicated email address, you prevent your Supernote from being overwhelmed with work meetings, random invites, and other non-essential events.
• You can control exactly what gets synced, keeping your Supernote as a personal, focused space.
2. Easily Forward Events from Outlook to Supernote
• If you receive an Outlook event invitation you want on your Supernote, simply forward it to your new email address, and it will appear in your Supernote Calendar.
3. Use Supernote to Create iCalendar Events with Custom Details
• You can create events on Supernote with details that automatically sync to iCalendar.
• This is useful for personal tasks like grocery lists—you can create an event titled “Grocery Run” and list your items in the event details. When you go to the store, the list will be accessible on your iPhone via iCalendar.
Final Thoughts
This setup allows you to keep your Supernote Calendar organized and distraction-free, while still maintaining an easy sync with iCalendar. Whether you’re managing appointments, transferring event invites from Outlook, or using Supernote to draft task lists that sync to your phone, this workflow gives you complete control over your digital planning.
Try it out, and see how it enhances your productivity!